Have you wondered how to showcase form submission from the WordPress form created in the free JetFormBuilder plugin? Then, this tutorial is definitely for you.
I’ll show you how to display form submissions via CPT, using plugins:
After the user submits my contact form, there are several options to store responses:
- send email to my inbox
- send the request to MailChimp
- Insert post
I would like to create a custom post type to store my form responses and show form submissions on the front end of my website with the Insert/Update Post submit action.
Show Form Submissions Using Custom Post Types (JetEngine Plugin)
JetEngine is the premium WordPress plugin for dynamic content that will help me create a new custom post type, “Form Submissions”. The steps to follow:
#1 Create a new CPT
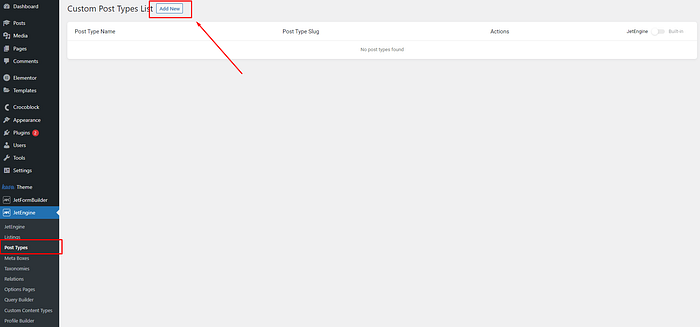
After installation and activation of JetEngine WordPress plugin, go to JetEngine -> Post Types -> Add New:
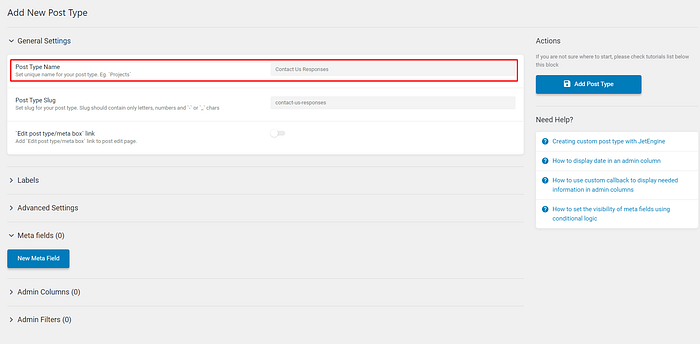
As I have several WordPress forms on my website, I need to create a memorable custom post type for my Contact form, let’s call it “Contact Us Responses”:
Then, I need to add meta fields according to my form:
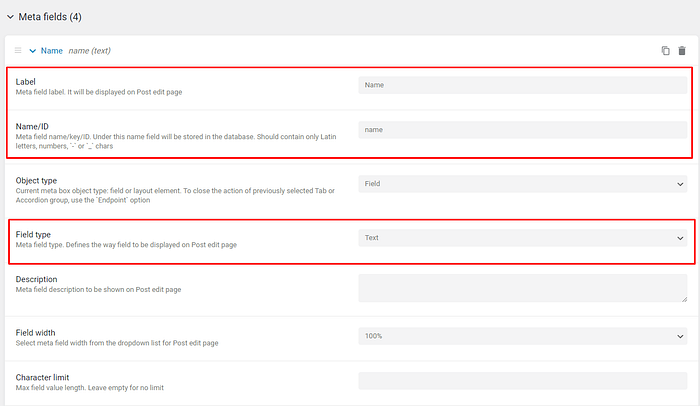
You just copy the labels from your form fields. For example, the first field is Name, I’ve put Label — Name, and ID — name, chose Field type as text.
But what if we have another field type? For instance, the Radio field:

No worries, we need to set the correct Field type and add Field options (in my case, it’s email, phone, and messenger):
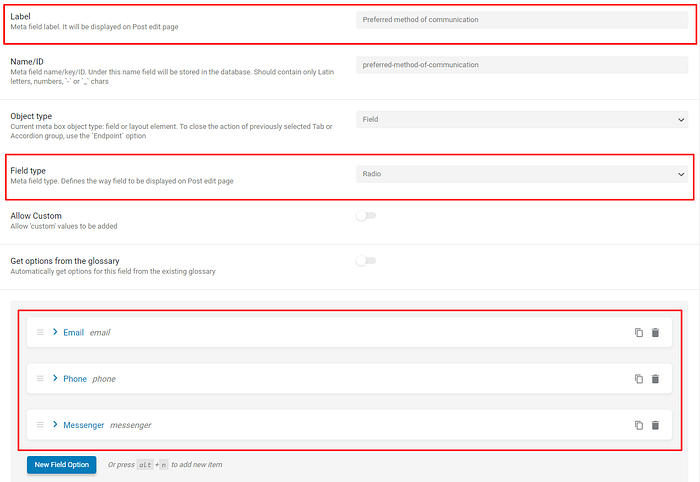
In results, I have 4 meta fields created in my CPT:

💡Please note: Labels & ID should be the same as in your WordPress form (in other words, the fields must match each other 😅).
Now my CPT is ready to store responses:
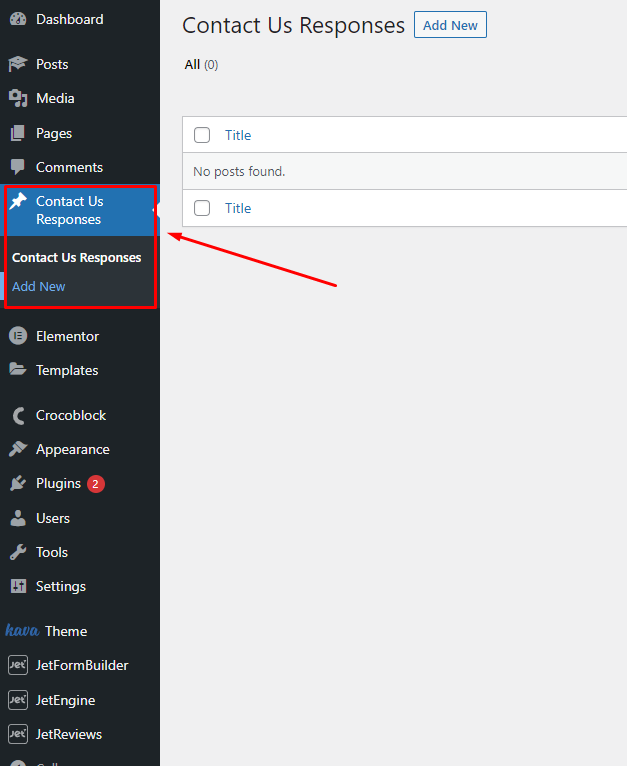
#2 Create WordPress form with JetFormBuilder
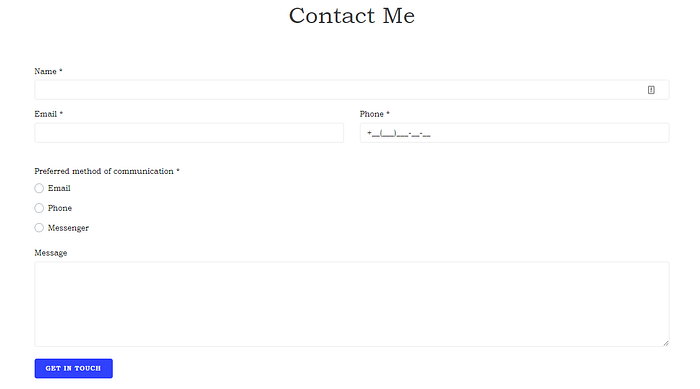
After creating CPT for storing your form submissions, feel free to create your WordPress form. I’ll proceed with the Contact me form.
💡The tutorial for creating the contact us form with JetFormBuilder is here.
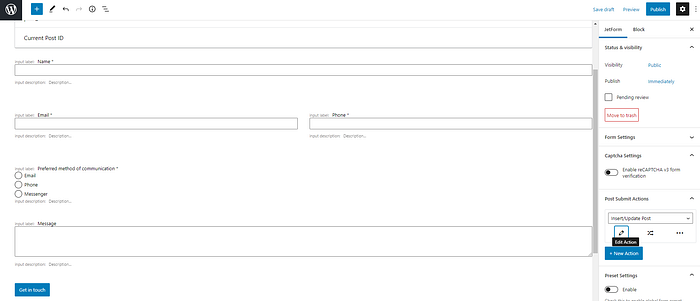
My form is ready to go:
#3 Set up post submit action
The contact WordPress form is ready to set up post-submit action. Choose the Insert/Update Post and press the edit icon:

And the edit action window appears. We need to map our Form with Custom Post Type and Fields.
So, I’ve set:
- my Post Type, as Contact Us Responses
- Post status as Pending Review
Fields map should be the same as your Post Type meta field (created before). For example, here are my meta fields created in Contact Us Responses CPT:

P.S. I simply copied ID and passed in my edit action window among Post Meta.
- Name as name
- Email as email
- Phone as phone
- Preferred method of communication as preferred-method-pf-communication
- Message as Post Content (it’s not a meta field, I want it to be shown in my post content section).
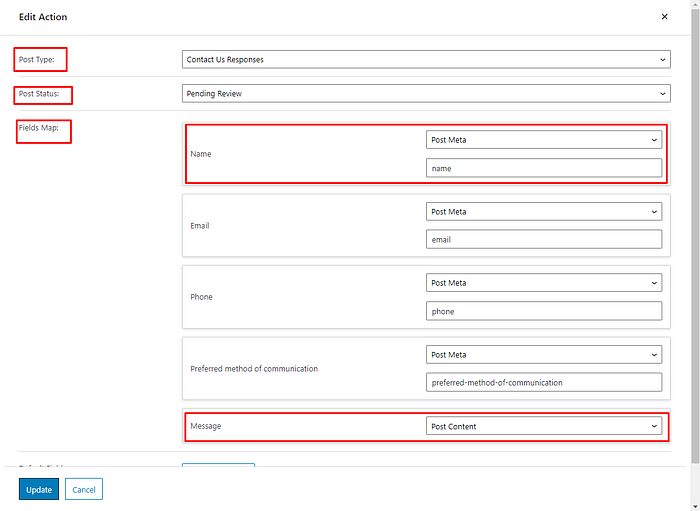
And press Update button. Now you can publish the form and add it to the page (with Gutenberg block, or via any other WordPress page builders plugins).
#4 Testing Time
Now it’s my favorite time — Testing! I’ve submitted my WordPress contact form:
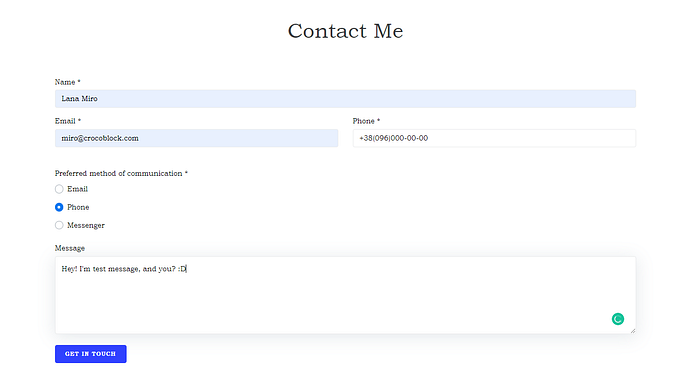
And went to my CPT (Contact Us Responses), where we could see new submissions:
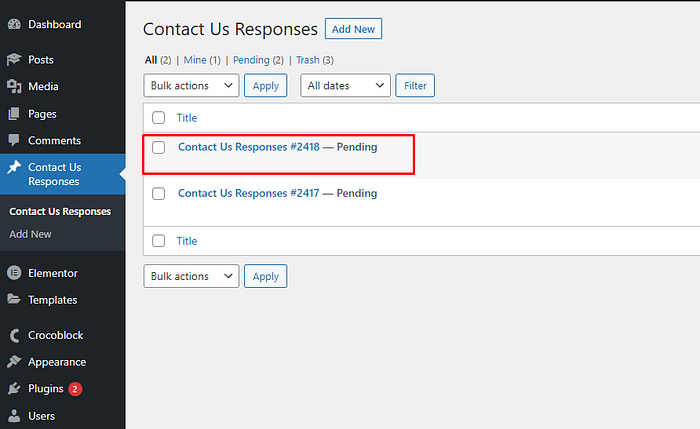
So, let’s open the post created automatically:
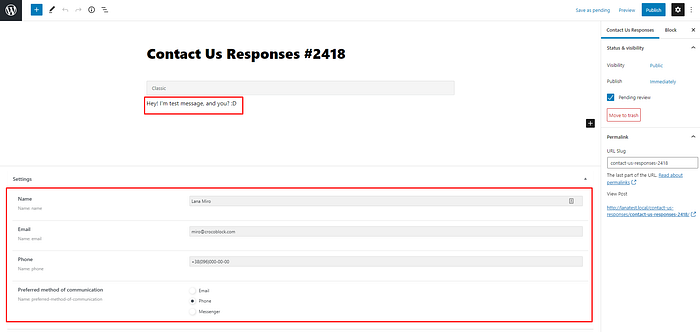
As you can see, the message goes immediately after the title, and contact details (like name, communication method, phone, email) show in settings.
Now, you can store all your contact form responses in custom post type using JetEngine & JetFormBuilder.😊
Creating CPT with free Pods plugin
Another way to create CPT is using the free Pods plugin, here are steps to follow:
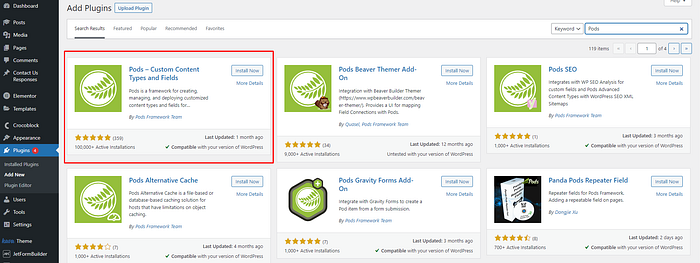
- Download and activate Pods plugin
- Create CPT and custom fields for storing form responses
- Create WordPress form
- Set Up post submit action
- Results
#1 Download and activate Pods plugin:
#2 Create CPT and custom fields for storing form responses
Go to Pods Admin -> Add New, and let’s create another CPT, called “Form Submissions”:
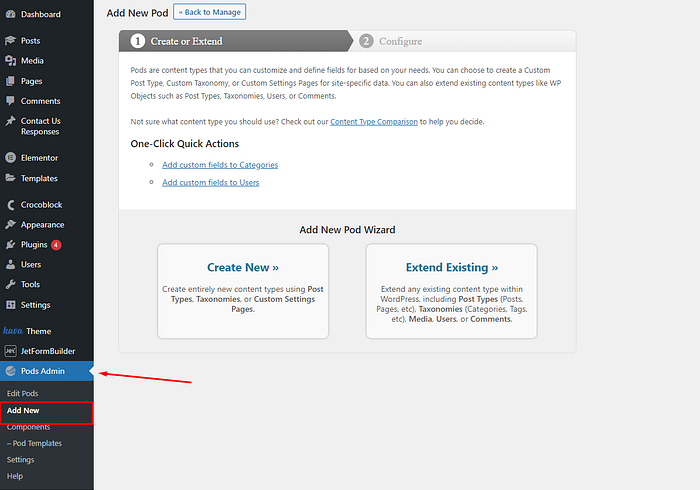
To add a new Pod, follow the steps:
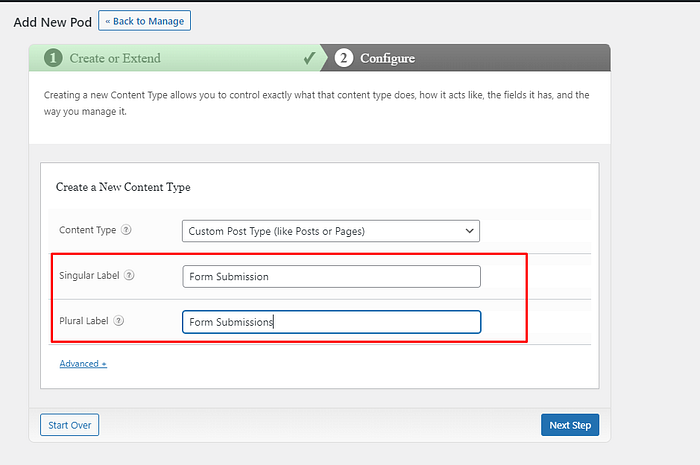
- Singular Label: Form Submission
- Plural Label: Form Submissions
Press Next Step, where we can add new fields similarly to our form fields.
💡This is important to have fields the same as in your form.
Add Fields (similar to JetEngine Meta Fields). Your name, email, and phone are simple text field types:
- as the name is reserved for internal WordPress usage, I’ll go with the Your Name label
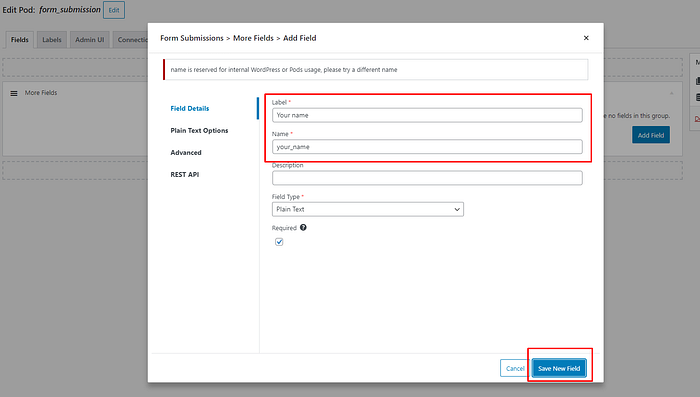
And Radio field will look like, where you input choices too:
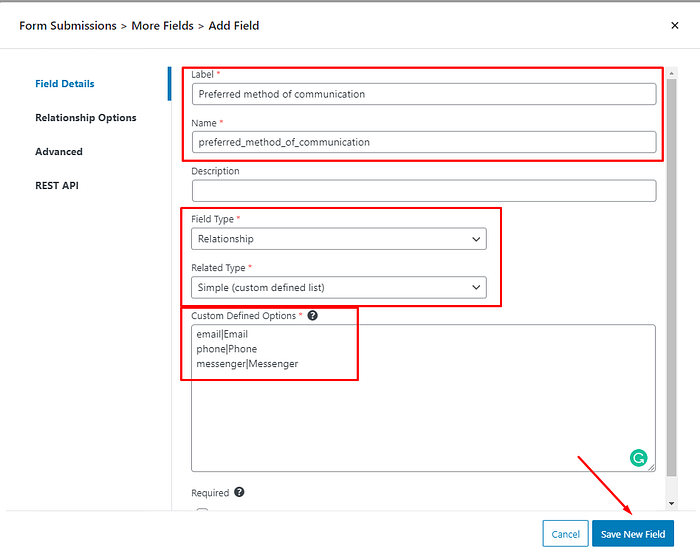
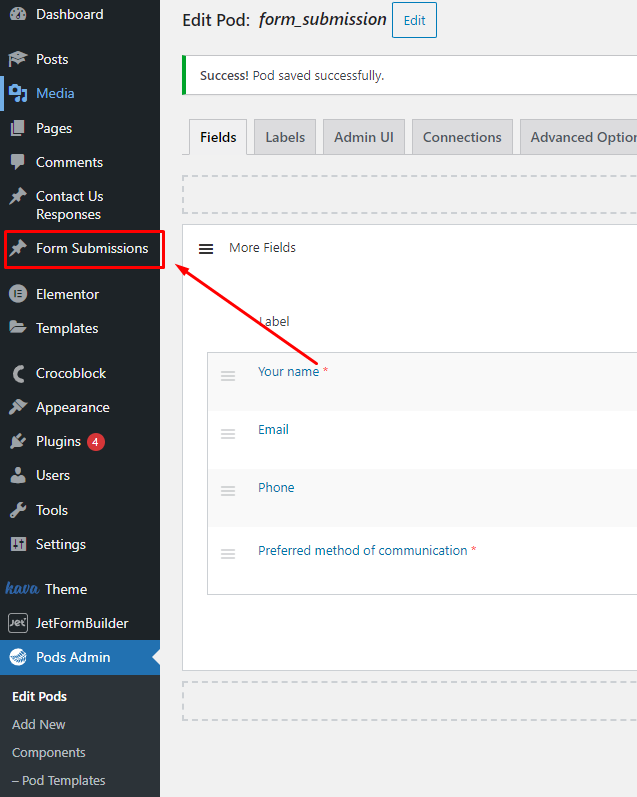
In results, I have 4 form fields created in my CPT with Pods plugin:

Then, you’ll find Form Submissions CPT at the left side of the WordPress dashboard.
#3 Create WordPress form
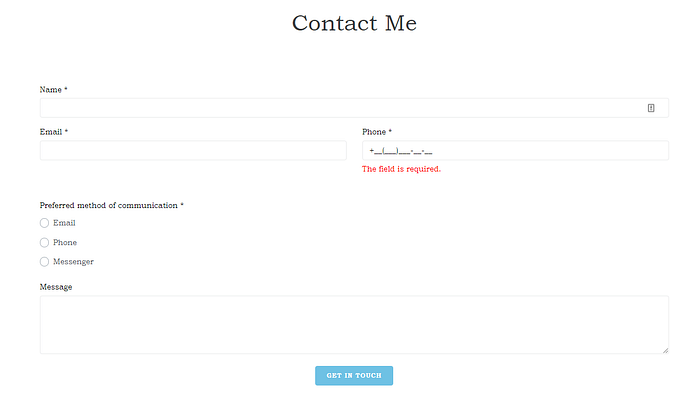
I’ll create a similar WordPress contact form using this tutorial.
#4 Set Up post submit action
When the form is ready, we need to create and edit post submit action (will be the same as above):
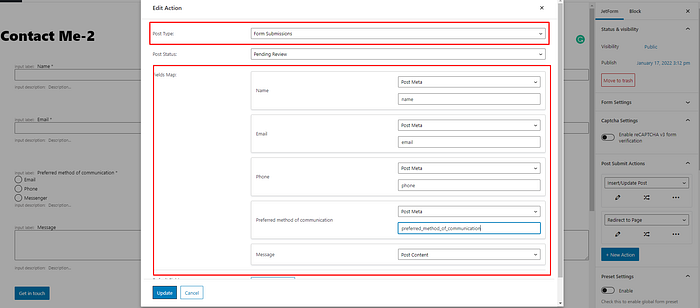
After setting up Insert/Update Post action, I’ve published my contact form:

#5 Results
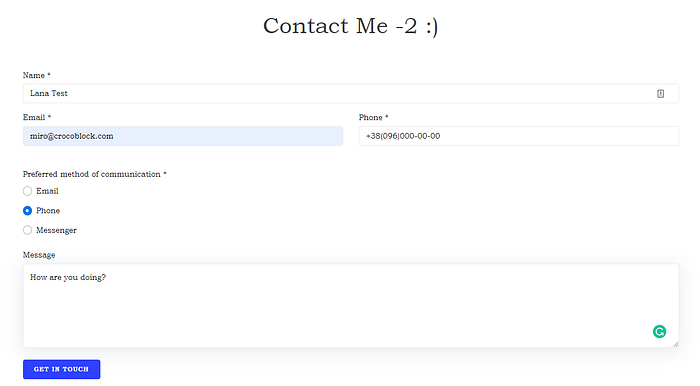
To finish, let’s test how it works with the Pods WordPress plugin. I’ve filled up my WP form:
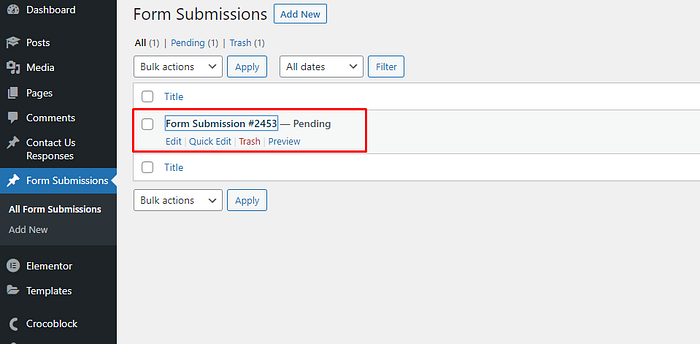
And my submission immediately appears in Form Submission CPT created with Pods:
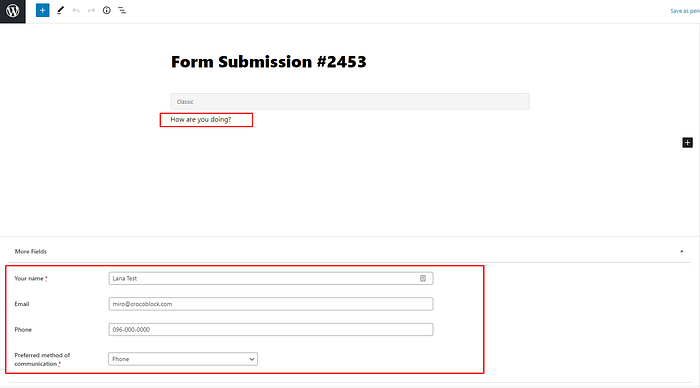
And fields mapped well:
Sum Up
Now, you know how to store your form responses with custom post types. To be honest, creating CPT with the JetEngine plugin was more fluent for me (maybe I just used to it), but if you need to stick with the free WordPress custom post types plugin, proceed with Pods or any other CPT plugin.
Feel free to share any questions you may have in the comments below. 👇

